
How to set Active PC – Tasker Profile
 Are you lucky enough to have more than one computer? If the answer is ‘yes’ this one is for you. Mark the PC, that you currently working on as active in Tasker. This way Tasker knows where to send files/messages/notifications. I will show you how this works by requesting pictures and screenshots from different PCs. You can expand this profile and send notifications, messages, other files etc. This way file is shared with a single machine only, rather than blasting it with Join to every device.
Active PC – Tasker profile
We are going to use AutoRemote and EventGhost for this. Note that EventGhost has to be installed on each computer you want to use. The theory is rather simple. Notify the phone/tablet each time you change the workstation. Once the variable is set, you can use it for all sorts of projects.
Alternative Setup
If you are using a work machine with admin restrictions you could use a WIFI condition (if available) or a geofence (or cell near) to achieve a similar effect. Note that these methods won’t work if both computers happen to be in the same location/connected to the same WIFI.
If you are interested in issuing voice commands from different computers, expecting results to be delivered to the same machine, take a look at the AutoVoice – Your PC name field. This option will pass the device name to Tasker as %avsource.
Tasker setup
I’m using the global variable which stores the most recently used computer. This variable can be used later for other Tasker actions: ie as IF condition.
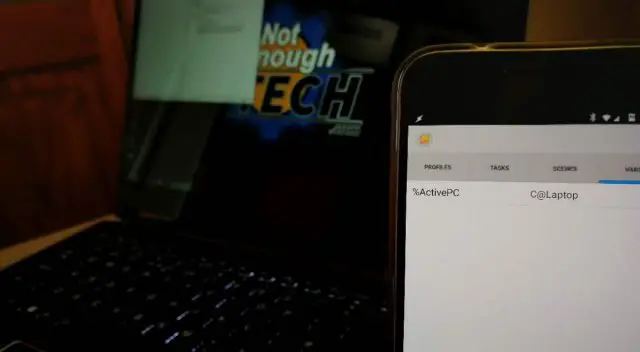
Profile: Set Active
	Event: AutoRemote [ Configuration:activePC ]
Enter: Set Active PC
	A1: Variable Set [ Name:%ActivePC To:%arcomm
	Recurse Variables:Off Do Maths:Off Append:Off ]
You can set the variable %ActivePC to anything you want, but for the best effect, keep the names in line with the Join names for your devices. I will show you why in the next tutorial.
The AutoRemote Event uses activePC as the filter, %arcomm contains the name of the computer. More on that below. This is pretty much all you need to complete the Active PC -Tasker profile.
EventGhost setup
I hope you have used the EventGhost before (otherwise click here). I need three profiles to get this profile sorted. The system goes to ‘idle’ after a minute of not receiving any user input. If you change the PC’s more often than this, the profile won’t work until the first idle time. This can be bypassed, but you will end up spamming the AutoRemote messages. The same EventGhost config has to be saved to every computer. Note, that you have to change the device names in the AR messages to suit your set up. I have two computers a laptop (C@Laptop) and desktop PC (C@Home).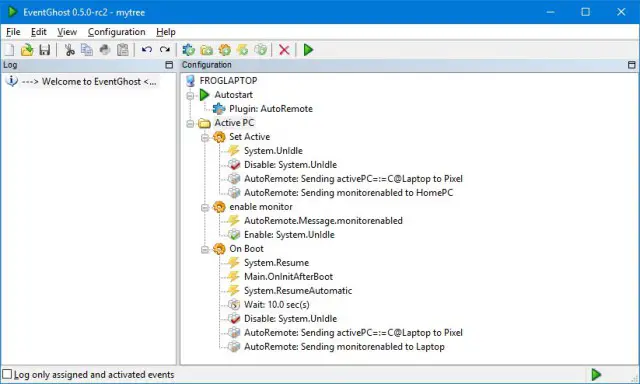
Set Active
This is the core profile. The trigger responds to ‘System.Unidle‘ and deactivates this trigger instantly. We don’t need AutoRemote to keep sending the messages if we have not changed the machine.
Two AutoRemote messages are sent, one to your mobile and one to the other PC. The mobile message has activePC=:=<name> format. This will help to filter the command in Tasker. AutoRemote message to another machine sends the monitorenabled message.
Enable Monitor
I want to enable the ‘System.Unidle‘ trigger when I start to use another machine. So I linked that action with the trigger ‘AutoRemote.Message.monitorenabled‘. This way, as soon as another computer is set active, this machine will be ready to take over once user input is detected.
On Boot
Lastly, I have replicated the Set Active config to work on boot (with a delay). This should keep me covered in the situations when the computer was powered off and unable to receive the activating message from the Enable Monitor. The triggers cover the sleep/boot/restart scenarios, and the AutoRemote messages are the same as in Set Active.
Get the last picture/screenshot – Tasker Profile
The Profile is not very complicated. Tasker looks for the last picture or a screenshot that has been taken by us and pushes it via Join to a correct machine.
A single file
Profile: Fetch Picture
	Event: AutoVoice Recognized [ Configuration:Command:
               "get the last (?<dir>picture|screenshot) (regex)" ]
        Enter: Get Picture
AutoVoice Command Recognised
You can use other triggers if you wish. I used the AutoVoice in the video to get the pictures sent over to the computer. For this method, you will need regex groups, something I have talked in detail before. The capturing group %dir contains picture|screenshot value that is used to determine the correct folder with media. I used the ‘get the last (?<dir>picture|screenshot)‘ as my filter.
Get the last picture/screenshot – task
Get Picture
	A1: List Files [ Dir:DCIM/Camera Match: Include Hidden Files:Off
            Use Root:Off Sort Select:Modification Date, Reverse Variable:%file ]
            If [ %dir ~ picture ]
	A2: List Files [ Dir:Pictures/Screenshots Match: Include Hidden Files:Off
            Use Root:Off Sort Select:Modification Date, Reverse Variable:%file ]
            If [ %dir ~ screenshot ]

	A3: Join Send Push [ Configuration:Files: %file1
Device Name: %ActivePC Timeout (Seconds):60 ]
Load the file names and sort it by the date (reversed) to an array (%file). The directory depends on the value of %dir variable from the AutoVoice trigger. I’m using List files action for that.
The selected file is used in a Join Push action. I mentioned before that I named my devices according to the names from Join. This saves me time as I can use the variable %ActivePC as the device name in push action (see advanced options).
Multiple files
Get Pictures
	TEST A1: Variable Set [ Name:%nofiles To:3 Recurse Variables:Off Do Maths:Off Append:Off ]
	TEST A2: Variable Set [ Name:%dir To:picture Recurse Variables:Off Do Maths:Off Append:Off ]
	A3: Variable Set [ Name:%count To:1 Recurse Variables:Off Do Maths:Off Append:Off ]
	A4: List Files [ Dir:DCIM/Camera Match: Include Hidden Files:Off
            Use Root:Off Sort Select:Modification Date, Reverse Variable:%file ]
            If [ %dir ~ picture ]
	A5: List Files [ Dir:Pictures/Screenshots Match: Include Hidden Files:Off
            Use Root:Off Sort Select:Modification Date, Reverse Variable:%file ]
            If [ %dir ~ screenshot ]

	A6: Array Pop [ Variable Array:%file Position:1 To Var:%filetosend ]
	A7: Join Send Push [ Configuration:Files: %filetosend
Device Name: %ActivePC Timeout (Seconds):60 ]
	A8: Variable Add [ Name:%count Value:1 Wrap Around:0 ]
	A9: Goto [ Type:Action Label Number:1 Label:Loop ]
            If [ %count < %nofiles | %count eq %nofiles ]
 What if you want to send last 2 or more pictures/screenshots? That’s not a problem either. We will have to repeat the same action X times for each file that we want to push to the computer.
Intercept a number of screenshots/pictures from a trigger. I suggest using another voice command to make it easier. Once you have the number of files needed and assigned to a variable %nofiles, you are ready to go. Use the regex group to capture the value and save it as a correct variable. I have used the TEST A1,A2 to set these.
Loop A6
First, assign a value 1 to %count variable, and place it as the 1st action. Array Pop action will assign the 1st position from the array to a variable %filetosend (update the Join Push). This action will also shuffle the elements up. Label this action as ‘Loop‘.
A7
Follow this with a Join Push action with a modified file option.
A8
Increase the value of the %count variable by 1.
A9
Keep looping with Go To (label: Loop)action until the value of %count <= %nofiles. This will send a number of files assigned to the %nofiles variable.
Other uses
In a similar manner, you can send any other files, notifications, messages etc. As long as they are stored in an array. The great thing about it is the %ActivePC variable that assures the info is going to be shared with one PC only. You can find the link for the profile and tasks files to download in the video description.
