How to setup a proxy server on your Android tablet or iPad

My work uses a proxy server to filter internet content. In my experience working IT, it is a pain to deal with on a lot of different levels. It isn’t so much that we are restricted from accessing certain sites, but more so that every device that wants to connect to the internet needs to run through the proxy. This means that the IT person (me) needs to setup every single device that wants to access the internet. We just recently installed a few new wireless access points on our internal network, and so the need to add the proxy information to mobile devices has just recently came up. It didn’t take a whole lot of looking to figure out how to do it on my TouchPad, or my iPad, but in case you need to do this and are having some trouble, here’s what you do.
Android
The place in Android that you find and implement proxy settings has changed a lot throughout the different versions. They’ve made it pretty easy in ICS, but apparently in Honeycomb (I have no way of testing) it is very annoying to try and get to. I will detail how to do it in ICS and Gingerbread, but if you have a Honeycomb tablet, you can try these directions to get to your proxy settings.
Ice Cream Sandwich
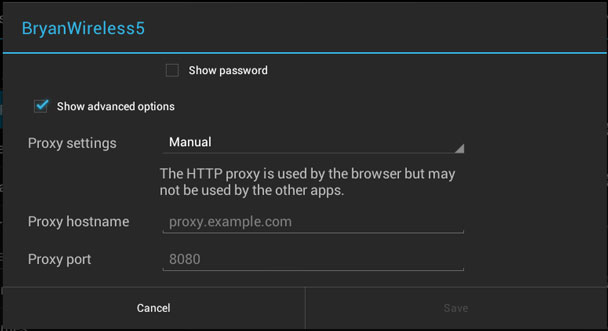
If you are running ICS, then it is pretty straightforward. Go to Settings > Wireless & networks. Long press on the name of the network that you need to add the proxy information to. When the popup box opens tap Modify Network and a new box will open. On the bottom left there is a check box that you need to check labeled Show advanced options. That will then reveal the Proxy settings and the IP settings options. Change the Proxy drop down from None to Manual. You will then need to scroll down a little bit and enter in your proxy information. Hit save when you are done, and then you’ll want to test it out to make sure it’s working.
Gingerbread
On my phone it was a little bit more difficult to get to the proxy settings, and even after finding it and adding them, it still doesn’t want to work completely right. To get to the place where you enter in your proxy information go to Menu > Settings > Wireless & networks > Wi-Fi settings > Menu > Advanced > Wi-Fi proxy. On that page there is a toggle to turn the proxy on and off and also a spot to enter the host and port number. Hopefully you have some better luck than I did with getting it to work on your phone, or maybe you have a phone running ICS.

Apple
On your iPad you need to go into the WiFi settings and tap the blue arrow next to the WiFi name. To get to WiFi go to Settings > General > Network > Wi-Fi. Once you tap the blue arrow for the WiFi you want to add the proxy to a new page will pop up with all kinds of information pertaining to your connection. If you ever need to find out your IP address or other network related information this is the page you will want to go to. Down at the bottom of the page you will see a heading titled HTTP Proxy with three boxes underneath it. The boxes are Off, Manual, and Auto. Tap the Manual box and then you want to enter your Server and Port number for your proxy server. If your proxy requires authentication then you can turn that toggle on and enter your username and password in the boxes provided. That’s it, head over to Safari and confirm that it is working as intended.
