A walk through on HTC devices from unrooted to rooted
 So you’ve got a computer, an HTC phone, and no idea where root begins and ends. This is an overview of the process I used to get a Windows 7 machine and an HTC device up from unrooted to rooted using the officially supported, HTC sanctioned method.
There are many shortcuts you can take, such as getting an all-in-one root kit, although keep in mind the shortcuts will leave you without the software or knowledge of how an action was taken. Refer back to that rootkit if anything below doesn’t work however; I don’t want to leave you stranded.
There are also variations from device to device. The following works for the One M8 on Sprint, and the EVO line, but your experience may vary.
Preparing yourself
You’re going to need the ability to execute some commands in a command window in Windows, so you’ll need to back up your phone and data somewhere if you want to keep any non-synced data. You’ll also want to give yourself a couple of hours for the first root you ever do.
Rooting can be done pretty quickly, but you don’t want to skip a step or do this when you’ll need the phone the instant you get done.
Preparing the computer
You’re going to need some things on your computer. These are: drivers for your phone, an ADB/Fastboot kit (small) or the Android SDK+Java SDK (huge, but useful), a custom recovery for your phone, a copy of the superuser binary or a custom ROM you want to use.
Phone Drivers
On first connect of your HTC One M8 to a computer, you should be prompted to install HTC Sync. Do this, let it install its drivers, and then immediately uninstall. The drivers should be left installed on your computer. You can also probably grab a copy of the Universal Naked ADB driver if you are not able to do that.
This will allow things on your computer to talk to things on your phone.
Android SDK
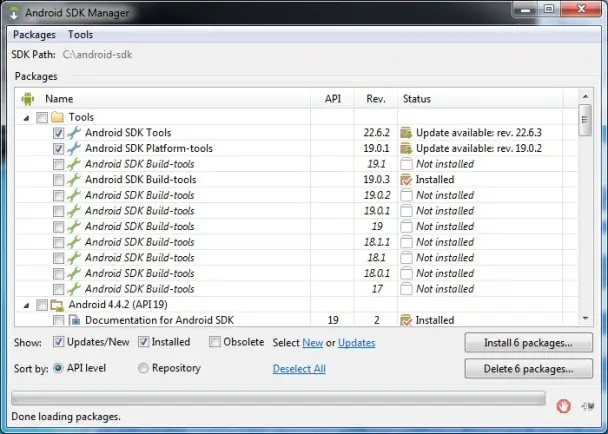
The Android SDK contains ADB and Fastboot. You can get these in a very small download (make sure you’re getting one from the past six months as these applications have changed recently), but if you want to do some of the funkier things later on or want an automatically updated ADB toolkit, you’ll want to do it the slightly longer way. I’ll tell you the slightly longer way, and you can take shortcuts if you want.
Before you install the Android SDK, you’ll need to download the Java Development Kit for 32 bit installs. It doesn’t matter if you’re running 64 bit or not – the 32 bit version works, the 64 bit version doesn’t. Go here, download, install the 32 bit version for Windows. If you’re not on Windows, you probably can use whatever version you want.
No go ahead and download and install the Android SDK. It’s big. Give it some time to install.
My install ended up in “c:\Program Files (x86)\Android\android-sdk” but that’s not where I want it to be. I’m going to create a thing called a symbolic link (symlink) on my root directory to make the android-sdk directory look like it’s sitting there.
On Windows 7 I do the following:
Start, type “cmd” in the box, when the cmd executable pops up under programs, right click and choose “Run as administrator.” This will give you a command window with administrative access.
The command to make a symlink on Windows we’re going to use is: mklink /D \android-sdk “\Program Files (x86)\Android\android-sdk”
When that’s executed you should be able to type cd \android-sdk” and be in the “\Program Files (x86)\Android\android-sdk directory. For me this is useful as I write scripts for mass-rooting based on that folder. If you don’t have a need to be in ADB and fastboot quite a bit you may just want to skip that step.
 Download everything you’ll need
 Download everything you’ll need
Rather than downloading as you go and realizing along the way that one of the things you’ve been reading is out of date, or the server you’re getting it from is down for maintenance, get everything before you flash anything.
Download a custom recovery
For purposes of this, we’re going to download Team Win’s Recovery Project from teamw.in. You’ll be downloading an img file and saving that somewhere you can remember. You can not install using goomanager. Don’t ask me why right now.
Download a superuser (if not flashing a new ROM)
For purposes of this, we’re going with the SuperSU binary from here. Download it for ARM unless you know you’re not on an ARM device. ARM s most of Android if not all.
Download a ROM
Download a ROM if you’re flashing a custom one. Once you download it, verify that the archive is intact by checking the MD5 us choosing test zip from whatever archive program you’re running. You don’t have to download a ROM if you’re happy with your phone as it was but just want superuser access.
As a side note, do not pay for any ROM pre-download – there are some out there that make wild claims and feature fake testimonies. These are generally fake. Also don’t donate to the a developer until you know they’re not stealing other people’s work.
Pre-root checklist
Remember your phone is going to be wiped clean in one of these steps. Take whatever measures you think you need to to protect your contacts and game data. I’m not going to go into how to backup here, we’ll do that some other time to keep this from being absurdly massive.
Ask yourself before you do any of the following:
- Have I downloaded everything I need for my device?
- Can I live without my phone for a while if something messes up?
- Is it a reasonable hour where I can reach out and get help from the internet?
- Is it 3:30 a.m. and you need your phone working in an hour and a half?
- If I lost my phone would I have all the information I needed somewhere?
- Are there people currently breaking into your house? You won’t be able to call 911 from your phone for a while.
- Do I have an old phone I could reactivate in case something takes this phone down for a while?
- Am I comfortable with potentially voiding my warranty?
And on to the rooting…
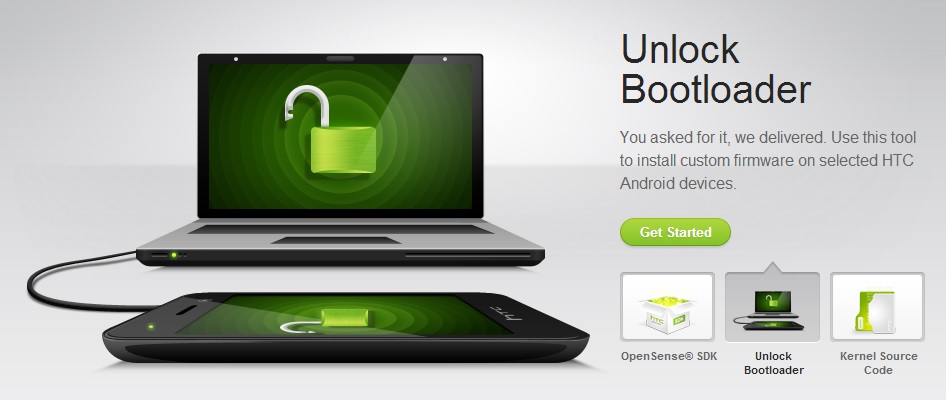
Unlock the bootloader

Your first stop in an officially sanctioned rooting path is to create an account at HTCDev. This is the developer’s portal that will erase and unlock your phone.
This is HTC’s website, and should they have wanted to make this an easy task it would be done as an application you just pressed a button and said “I want root!” or it could all be about security – never know.
You’ll go through an unlock your bootloader at HTCDev. It will walk you through the process of getting a token. The ADB and Fastboot it recommends might just be located in c:\android-sdk\platform-tools if you did my symbolic link thingie above. Otherwise, as long as you’ve installed the SDK they should be in c:\Program Files (x86)\Android\android-sdk\platform-tools.
Unlocking your bootloader means you’re going to lose all the data (but not the photos) on the phone. All unlocking the bootloader actually does is enable you to flash a custom recovery.
Flash a custom recovery
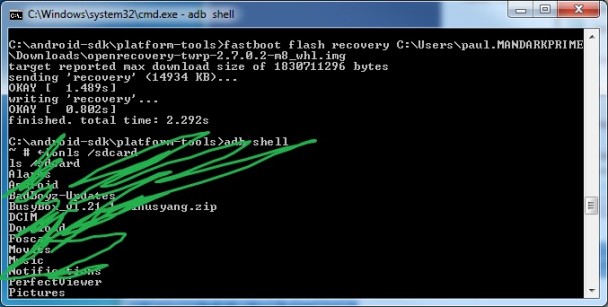 In a previous step I had you download a custom recovery off of Team Win’s website. For purposes of this set of instructions, I’m going to lie and say my recovery downloaded into c:\temp. The screen shot will show the lie, but whatever.
With your phone connected to your computer in fastboot mode (power off, press volume down+power until you reach bootloader/see Fastboot USB,) open a command prompt by hitting start, typing cmd, then execute the following to flash a new recovery
- cd \android\sdk\platform-tools
- fastboot flash recovery c:\temp\openrecovery-twrp-2.7.0.2-m8_whl.img <- this recovery is for the Sprint HTC One M8, yours may be different
You’ve flashed a custom recovery.
Installing Superuser access into the stock ROM
 If you’re flashing a new ROM, you can skip this step; this is just to take the stock ROM and modify it to be rooted.
You’ll see on the screen of the phone from the last step that there’s an option for Recovery (or you might have to choose Hboot, then recovery). Select that using the volume keys and power button and viola! You’re in your fancy new flashed recovery.
This is the first time you’re going to flash something from recovery, but we’ve got to get the Superuser Binary file there first.
Before I’d mentioned you should have downloaded a SuperSU binary, in this case we’re calling it Superuser-3.1.3-arm-signed.zip. Let’s assume you have that in the temp folder also and have not copied it to your phone.
From the command window you’ve still got open from flashing a custom recovery, we’re going to push the file from your computer to the phone. The command to do this is:
- adb push c:\temp\Superuser-3.1.3-arm-signed.zip /sdcard/
The file should now be in the root of your phone and flashable via recovery.
To do this in TWRP we would select install, then scroll down to Superuser-3.1.3-arm-signed.zip and select that. Once that’s installed, reboot your phone, there should be a Superuser application in your programs when you reboot your phone.
You’re rooted!
 You’re rooted!
An alternate path is to find a custom ROM for your device and flash that in the stead of a Superuser binary … custom ROMs generally have Superuser preinstalled.
Make a nandroid backup
Boot into recovery and make a backup somewhere so that if anything goes wrong, you’ve got a restore point. As long as you’ve got a good backup, you can go crazy with your phone and know that you can restore it to that point if you bork something.
Asking for help (how to)
So you’re here. I wrote this piece in May of 2014. You can expect that other people will be reading it for about two to three weeks. After that there’s probably no one going to be reading the comments except for me if I’m notified that they posted, or people on the internet if this actually becomes a popular article. Every day we get run across people posting on several-year old articles asking for help on something, and if we catch them we can reply and point them in the right direction.
If you want to be assured you’re going to get help on any site you visit, verify that the article is relatively fresh. If you need help with your specific device, I generally point people to the forums at xda-developers to get help with anything non-EVO or non-M8. If you’re having problems with a ROM, go to the developer of that ROM and ask them and their followers for help – you’ll generally get it extremely quickly.
S-OFF, Rooted and Unlocked are three different things
 S-OFF, Rooted and Unlocked are three different things
Your first lesson post-root is that although you are rooted, you are not S-OFF. On most carriers after you’re rooted you can now obtain S-OFF, and on some you could have done that beforehand. S-OFF allows you to flash radios, write to the /system partition without a modified kernel, and do some neat stuff.
Unlocked allows you to flash a custom recovery.
Rooted means you have an application that allows you to run shell scripts as the superuser. It is possible on some phones to get Superuser without being unlocked or S-OFF, however you’re generally at least sporting an unlocked bootloader and a custom recovery at that point.
Did I err?
As much as I try to make sure that everything is in the correct order and up to date, most of the originating steps (such as installing drivers for the phone,) I did long long ago. If you see anything incorrect, I’d appreciate a heads-up before someone shoots themself in the foot.
