
Join App by Joao Dias adds new features each week, it’s hard to catch up sometimes. While the big deal for me was the NodeRED support, there has been a new feature added recently that got missed in the process. Join custom commands now are available and can be used for virtually anything. I’d like to highlight it, and show you how Join custom commands could be used.
Using Join custom commands
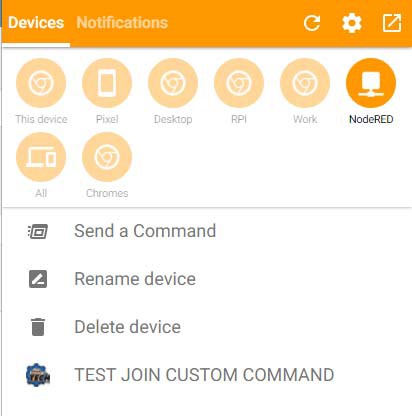
If you open Join’s settings, you will see the new tab, where the commands can be set. It’s pretty straightforward if you used the AutoApps command system before. If not – here is a quick reminder:
command=:=param1=:=param2=:=param3...
The command directs the Join custom command to the correct source (not the device). It could be a Tasker’s profile, a flow in NodeRED or EventGhost macro.
Params are where you pass the parameters or data you wish you send for further processing.
Adding Join Custom Commands


- Name – self-explanatory
- Icon – any publicly available URL
- Command – your “command=:=data1=:=data2” in that form
- Prompt Text – additional popup where you can cancel or modify your command
- Select Devices – pick the targeted devices.
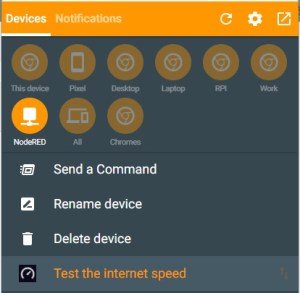
Note that you can actually push the Join Command to all devices, but the command would only work on the devices which respond to the correct command word. It’s worth noting that Join Custom Commands are stored locally right now and there is no synchronization between different devices yet. (I have asked for this to be a feature).

The prompt text lets you add additional information to your command. The command remains the same but the new data is appended to the predefined command:

node=:=test
would become:
node=:=test=:=I love NotEnoughTECH=:=seriously
Now that we have some Join Custom Commands – let’s see how they work.
Cool use cases:
I’m going to show you X use cases, I hope this will illustrate how powerful the Join Custom Commands can be.
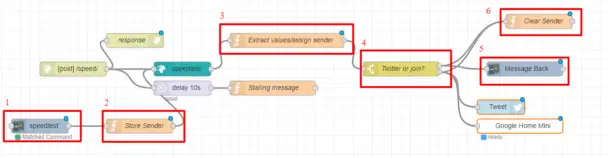
Internet Speed Test (NodeRED)


-
- The Join Receive node will react to any command that starts with “speedtest” – I don’t need special values so you can use anything after =:=
- Because of the msg.push.senderId (which stores info about the device the push has been sent from) will get wiped in the process, we have to store it within the scope of this flow. The Function node will store the senderId as x
var sender = msg.push.senderId; flow.set('x', sender); return msg; - The function node has been modified a little as I don’t want the Join commands to be tweeted out. Main changes are the msg.denderId which contains the ID set previously and msg.text which stores the text for the push.
var download = msg.payload.speeds.download; var upload = msg.payload.speeds.upload; msg.senderId = flow.get('x'); msg.text = "The download: " + Math.ceil(download) + " Mbps" + " and upload: " + Math.ceil(upload) + " Mbps" ; msg.twitter = "#GoogleHome Internet Speed Test: The download: " + Math.ceil(download) + " Mbps" + " and upload: " + Math.ceil(upload) + " Mbps #NotEnoughTECH Learn more on: http://www.notenoughtech.com/home-automation/test-internet-speed-google-home/"; msg.payload = "The download speed is: " + Math.ceil(download) + " Megabits per second" + " and upload speed is: " + Math.ceil(upload) + " Megabits per second" ; return msg; - (optional) Twits should be created only when the test is requested via a smart speaker. If the same test is prompted from Join I don’t need it. The switch node tests the msg.senderId for a null value. If that property is null, a tweet and smart speaker response are sent.
- Join Push node with predefined values (text, senderId are not set)
- The last function node clears the stored sender info. I need this variable to be null if the request is made through other channels.
var sender = null;
flow.set('x', sender);
return msg;


Regardless of the device used, the information always goes back to the sender.
Put PC to sleep (EventGhost)
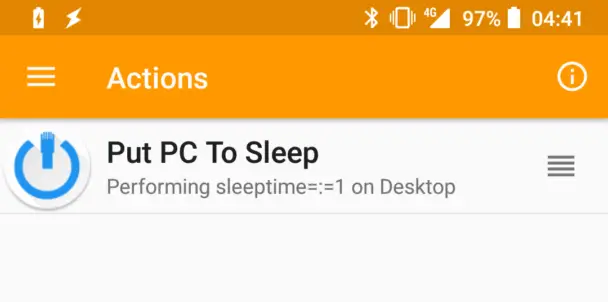

The command I’m going to use is:
sleeptime=:=1
This is going to be sent to my PC (but you can send it to multiple computers). To connect the EventGhost to a PC, you have to open up Join settings on the target PC and set the port. AutoRemote plugin for EventGhost will be also listening on the same port. Follow these instructions to add the plugin.

On my PC, EventGhost will wait for the command and will put the computer to sleep – with the Sleep action. It’s a good idea to display a short warning and delay the process few seconds.
Watch Authenticator (Tasker)


Opening apps on the smartwatch is annoying, to say the least, and you can do so by sending this command:
smartwatch=:=authenticator


To open the Authenticator app all I need is a single task from AutoWear. In the App section of the action type in the name of the app that you want to open (Authenticator) and add an IF statement (%aacomm = authenticator) if you think you will link more than one app in the future.
The task will respond to the AutoApp command “smartwatch”, and pass the “authenticator” as the command (%aacomm).
Conclusion
The Join Custom Commands can be super useful. It’s easy to set up, fast and extremely agile. You can connect it to NodeRED, Windows PC running EventGhost or ping the command back to Tasker.
I write for pocketables.com for free, if you enjoy my content you can buy me a coffee via PayPal or join one of Patreon Rewards tiers. You can download the tutorial files from this page.

