Quick Tasker tip: Use additional scenes to group scene elements

When dealing with scenes in Tasker, it’s easy to get overwhelmed by all the elements and references needed to make something work the way it should. That is especially the case with scenes that have app-level complexity, and recently I discovered a way to at least make one aspect of it easier to handle, by grouping elements in additional scenes.
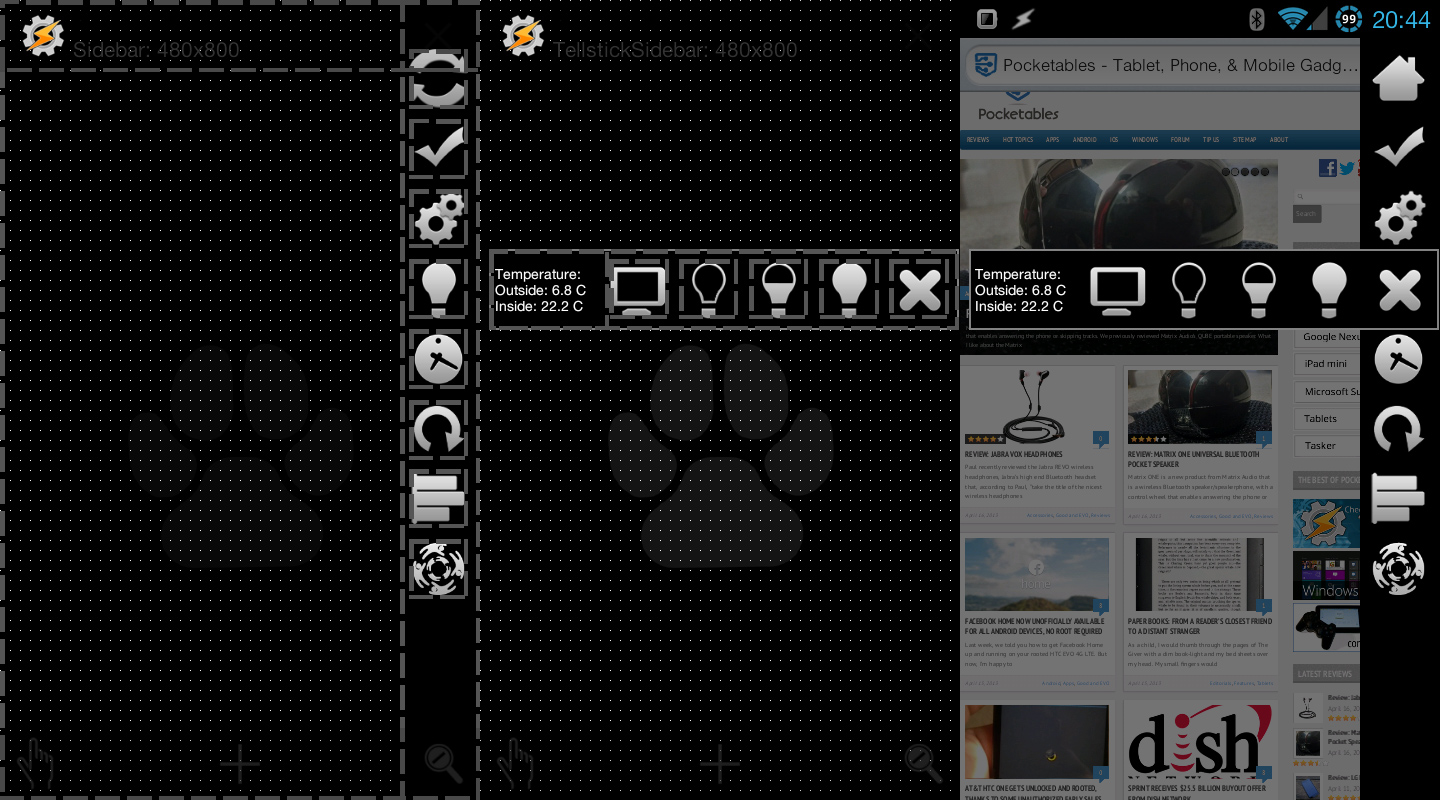
I already briefly mentioned this in my Tasker sidebar article, but I thought it was worth dedicating a post to it so it’s easier to find.
Sometimes when dealing with scenes, you need to manipulate- or use- entire groups of elements more dynamically than the scene system itself is capable of. You might for instance have a UI that has several tabs, where each tab has different contents, but where they all share a common menu. Another example is if you’re dealing with any sort of scene that requires text input, or a pop-up menu of settings, but you don’t want to dedicate a part of the scene to display it permanently.
What you can do in those situations is to simply use more scenes and stack them intelligently. For those familiar with HTML, this is essentially like having dedicated sidebar, header, footer, and content files, instead of hard-coding everything into a single html.
As an example, you have several options when dealing with a situation like I described above, where you have a scene with multiple tabs. You can stuff everything in one scene, and just manipulate the visibility of elements to control what’s visible. The downside here is that you end up having to run a lot of visibility actions if the scene is complex, and it can’t be very dynamic. You can also duplicate the scene for each tab, so that you simply switch between entire scenes to go from one tab to the next. The downside of that is that while you can link all the buttons to the same task and only need to change that once for it to apply to all scenes, any change in color, image, size, position, and so on needs to be done in each scene.
The alternative is to create several scenes; one that has all the navigation tabs, and then the scenes that contain the actual content. By layering these on top of one another you can then use both scenes at the same time, not have to reload the navigation bar to switch tabs, and only have to change things in one place.
This method isn’t without its drawbacks either, however. This method is dependent on what display mode you use, and I’ve found it to work best with full screen blocking overlay scenes, which then have the downside of blocking any dialog type scenes (for instance those created by Menu or Variable Query actions). You also need to make sure that they layer properly, which is best done by leaving the top scene without a background, and making sure that nothing is blocking the path down to the scene below. Rectangle elements are great for creating backgrounds for scene elements without covering the entire screen.
Another downside is that you then have to destroy more scenes when exiting the scene, in order to destroy all the parts of the scene. It’s particularly important to make sure you have an exit button for each scene, to avoid showing a scene that you can’t get rid of. You will also need to keep your calm when it comes to referencing elements across scenes, so that if you have a button in one scene that manipulates an element in another, it actually refers to that scene and not itself.
A “lite” version of this method is to simply use dialog scenes to handle a lot of the things you would otherwise dedicate part of a scene to do. For instance, if you need to input text in part of your scene, you can use the Variable Query action to pop up a dedicated text input box from a button, rather than mess around with a TextEdit element in the scene itself. Menu actions can be used to create quick access to various scene settings, and so on. Just make sure that the scene type you use supports showing dialogs on top if you do this.
I’m not saying to avoid the alternative methods here, as they’re all just various ways of accomplishing a task. All I’m saying is that this is a method that is possible to use instead of some of the more traditional approaches, and I’ve had luck in using it for some of my scenes.

